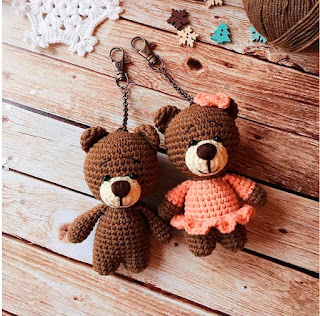
Amigurumi Bear - Patrón Gratuito

Puntadas ch: cadena pts: puntada (s) sl st: slip stitch sc: solo crochet dc: crochet doble rep: repetir [número]: número de puntadas en la ronda o raya Dificultad: baja
Como hacer la cabeza del oso
1st round: cast on 6 sc in the magic ring (6)
2nd round: 6 incs (12)
3rd round: (inc in the following sts, sc in the following sts) rep 6 times (18)
4th round: (inc in the following sts, sc in the following 2 sts) rep 6 times (24)
5th round: (inc in the following sts, sc in the following 3 sts) rep 6 times (30)
6th round: (inc in the following sts, sc in the following 4 sts) rep 6 times (36)
7th round: (inc in the following sts, sc in the following 5 sts) rep 6 times (42)
8th round: (inc in the following sts, sc in the following 6 sts) rep 6 times (48)
9th round: (inc in the following sts, sc in the following 7sts) rep 6 times (54)
10th round: (inc in the following sts, sc in the following 8 sts) rep 6 times (60)
11th round: (inc in the following sts, sc in the following 9 sts) rep 6 times (66)
From the 12th to the 22nd round {11 rounds}: sc all the sts (66)
23rd round: (dec, sc in the following 9 sts) rep 6 times (60)
24th round: (dec, sc in the following 8 sts) rep 6 times (54)
25th round: (dec, sc in the following 7 sts) rep 6 times (48)
26th round: (dec, sc in the following 6 sts) rep 6 times (42)
Colocar los ojos de seguridad entre las 18 o 19, y una separación entre ellos de unos 15cm.
una vez puestos, seguimos con la labor.
27th round: (dec, sc in the following 5 sts) rep 6 times (36)
28th round: (dec, sc in the following 4 sts) rep 6 times (30)
29th round: (dec, sc in the following 3 sts) rep 6 times (24)
28th round: (dec, sc in the following 4 sts) rep 6 times (30)
29th round: (dec, sc in the following 3 sts) rep 6 times (24)
Cortamos y dejamos una hebra larga.
1st round: cast on 6 sc in the magic ring (6)
2nd round: 6 incs (12)
3rd round to the 5th round {3 rounds}: sc all the sts (12)
Como hacer las patas del oso
1st round: cast on 6 sc in the magic ring (6)
2nd round: 6 incs (12)
3rd round: (inc in the following sts, sc in the following sts) rep 6 times (18)
4th round: (inc in the following sts, sc in the following 2 sts) rep 6 times (24)
5th to 8th round {4 rounds}: sc all the sts (24)
Como hacer el cuerpo del oso amigurumi
9th round: sc in the following 21 sts of the first leg, skip the last 3 sts of the first leg and the next 3 sts of the second leg, sc in the following 21 sts of the second leg, place a stitch marker in the last sts [42]
10th round: (inc in the following sts, sc in the following 13 sts) rep 3 times (45)
11th round: (inc in the following sts, sc in the following 14 sts) rep 3 times (48)
12th round: (inc in the following sts, sc in the following 15 sts) rep 3 times (51)
13th round: (inc in the following sts, sc in the following 16 sts) rep 3 times (54)
From the 14th to the 21st round {8 rounds}: sc all the sts (54)
22nd round: (dec, sc in the following 16 sts) rep 3 times (51)
23rd round: sc all the sts (51)
24th round: (dec, sc in the following 15 sts) rep 3 times (48)
25th round: sc all the sts (48)
26th round: (dec, sc in the following 14 sts) rep 3 times (45)
27th round: (dec, sc in the following 13 sts) rep 3 times (42)
28th round: (dec, sc in the following 12 sts) rep 3 times (39)
29th round: (dec, sc in the following 11 sts) rep 3 times (36)
30th round: (dec, sc in the following 10 sts) rep 3 times (33)
31st round: (dec, sc in the following 9 sts) rep 3 times (30)
32nd round: (dec, sc in the following 3 sts) rep 6 times (24)
Como hacer los brazos del oso
1st round: cast on 5 sc in the magic ring (5)
2nd round: 5 incs (10)
3rd round: (inc in the following sts, sc in the following sts) rep 5 times (15)
From the 4th to the 10th round {7 rounds}: sc all the sts (15)
11th round: dec in the following 13 sts (14)
12th round: sc all the sts (14)
13th round: dec, sc in the following 12 sts (13)
14th round: sc all the sts (13)
15th round: dec, sc in the following 11 sts (12)
16th round: sc all sts (12)
17th round: dec, sc the following 10 sts (11)
18th round: sc all the sts (11)
19th round: dec, sc in the following 9 sts (10)
20th round: sc all the stitches (10)
Rellena los brazos. Corte y asegure el hilo dejando suficiente para coser los brazos entre las rondas 28 y 29 del cuerpo.2nd round: 5 incs (10)
3rd round: (inc in the following sts, sc in the following sts) rep 5 times (15)
From the 4th to the 10th round {7 rounds}: sc all the sts (15)
11th round: dec in the following 13 sts (14)
12th round: sc all the sts (14)
13th round: dec, sc in the following 12 sts (13)
14th round: sc all the sts (13)
15th round: dec, sc in the following 11 sts (12)
16th round: sc all sts (12)
17th round: dec, sc the following 10 sts (11)
18th round: sc all the sts (11)
19th round: dec, sc in the following 9 sts (10)
20th round: sc all the stitches (10)
Como hacer la bufanda del oso
Stripe 1: 2 dc in the fourth ch from the hook, turn the work over
Stripes 2 – 6 {5 stripes}: 3 ch and 1 dc en los primeros pts (para obtener el aumento), trabaje la dc hasta el final de la franja, dé vuelta el trabajo
Stripes 2 – 6 {5 stripes}: 3 ch and 1 dc en los primeros pts (para obtener el aumento), trabaje la dc hasta el final de la franja, dé vuelta el trabajo
Stripes 7 – 41 {or until you get to a length of 65cm}: 3 ch (counts as 1 dc), dc in all the sts, turn [8]
Stripes 42 – 46: 3 ch (counts as 1 dc), dc all the sts until 2 sts from the end of the stripe, skip 1 sts, dc the last sts of the stripe, turn the work over
Para finalizar la bufanda, se crean dos pompones para cada extremo de la bufanda para darle un toque perfecto!


Comentarios
Publicar un comentario